Submit a Logic Project

If you would like to receive feedback on your composition from someone who does not use the same sound libraries as you, here is how to optimally share a Logic project with them:


1 – Exporting the Audio
  • Set the Loop Locators (yellow line) to determine the area that will be exported.
projet_logic_zone

Export the audio as stems or individual tracks (depending on what was determined during the course):

  • To export the audio as stems:
    • Solo all tracks belonging to the same stem
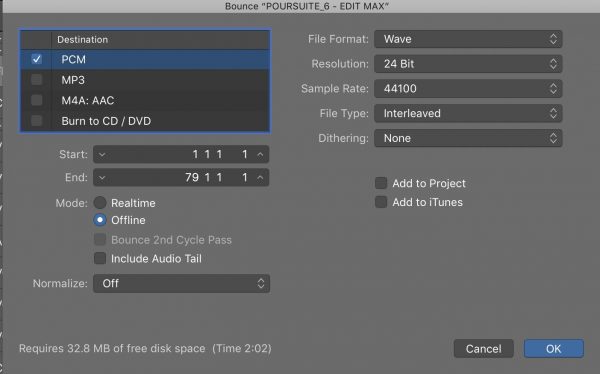
    • Select: File / Bounce / Project or Section
    • In the window that opens, select the following options: PCM, Wave, 24 Bit, 44100
projet_logic_export_stem
  • Name the audio file clearly, e.g.: “Brass,” “Percussion,” “Low Strings”

To export the audio as individual tracks:

    • Make sure no track is in “solo” or “mute” mode
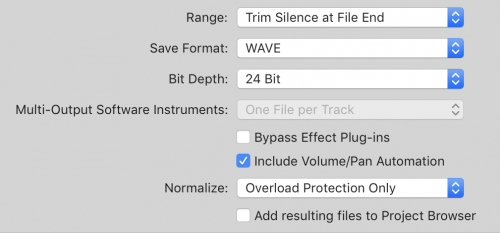
    • Select: File / Export / All Tracks as Audio Files
    • Choose the WAVE, 24 Bit format
    • Make sure “Bypass Effect Plugins” is NOT checked
    • Make sure “Include Volume/Pan Automation” is checked
projet_logic_export_tracks
  • Make sure the audio files are clearly named, e.g.: “Horns Stacc,” “VC Legato,” etc. Rename the audio files if necessary.
  • If, in your Logic project, you have Summing Stack folder tracks (e.g.: all brass tracks are grouped into a common folder), audio files corresponding to the output of these folder tracks were created during the audio export (e.g.: a track containing the audio from all brass tracks). These audio files have the same name as their corresponding folder tracks (e.g.: if a folder track is named “+BRASS,” the audio file will also be named “+BRASS”). Since you only need to provide the audio files corresponding to the individual tracks, delete all audio files corresponding to the folder tracks.
  • Make sure the track names are clear:
    • Include the name of the instrument or stem (e.g.: “Cello” or “Strings”)
    • Do NOT include the project name
    • If the export added the suffix “_1” to the end of the file names, remove it.
  • If you plan to provide the audio files separately from a Logic project, group them in a folder named “Audio Files.” If the audio files are exports of each individual track (rather than stems), group them into subfolders identified by instrument families (e.g.: “Strings”)


2 – Exporting the MIDI
  • Before exporting the MIDI file:
    • If you have not already done so, add markers with the chord names corresponding to each chord in your composition, e.g.:
projet_logic_marqueur

Save your Logic project under a different name (e.g.: “Boss Fight – MIDI Export”) in order to keep an intact copy before performing the steps in the next section.

Follow all the steps included in the “Prepare MIDI region for export” section:
https://support.apple.com/en-ca/guide/logicpro/lgcp77376cad/mac

3 – Create a new Logic project
Create a new Logic project
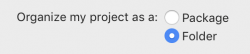
Save the Logic project in folder format: File / Save

projet_logic_folder
4 – Import the MIDI file
  • Import the MIDI file into the new Logic project
  • Create a folder track: Track / Create Track Stack / Summing Stack
  • Name the folder track “+MIDI”
  • Put all MIDI tracks into this folder
  • Arrange the tracks within the folder track so that they are in the same order as the staves in an orchestral score, e.g.: Flute 1, Flute 2, Oboe 1, etc.
  • Identify the folder track and the MIDI tracks with the color pink:
    • Select all MIDI tracks
    • Track / Assign Track Color
  • Identify the MIDI clips with the color pink. (As a shortcut, select all MIDI clips and press: Shift + Alt + C)


5 – Import the audio files
  • Import all audio files into the Logic project
  • Create folder tracks for each instrument group: Track / Create Track Stack / Summing Stack
  • Name the folder tracks by instrument group, preceded by the “+” symbol, e.g.: “+WOODWINDS,” “+BRASS,” “+STRINGS,” etc.
  • Place each track in the corresponding folder track.
  • Arrange the tracks within the folder track so that they are in the same order as the staves in an orchestral score, e.g.: Violin 1, Violin 2, Viola, Cello, Double Bass.
  • Place all folder tracks under the +MIDI folder track, in the same order as the systems in an orchestral score, e.g.: +WOODWINDS, +BRASS, +PERCUSSION, +STRINGS
  • Identify the folder tracks and their corresponding audio tracks with the following colors:
    • Woodwinds: blue
    • Brass: yellow
    • Percussion: green
    • Piano: red
    • Strings: orange
    • Electronic elements: purple
  • To determine the track color:
    • Select a folder track and all of its corresponding audio tracks
    • Track / Assign Track Color
  • Identify the audio clips with the color corresponding to their track. (As a shortcut, select all audio clips and press: Shift + Alt + C)


6 – Finalize the Logic project
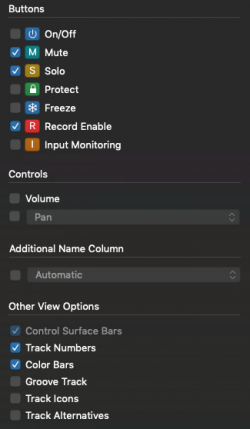
  • Adjust the track header as follows: Track / Configure Track Header
projet_logic_track_header

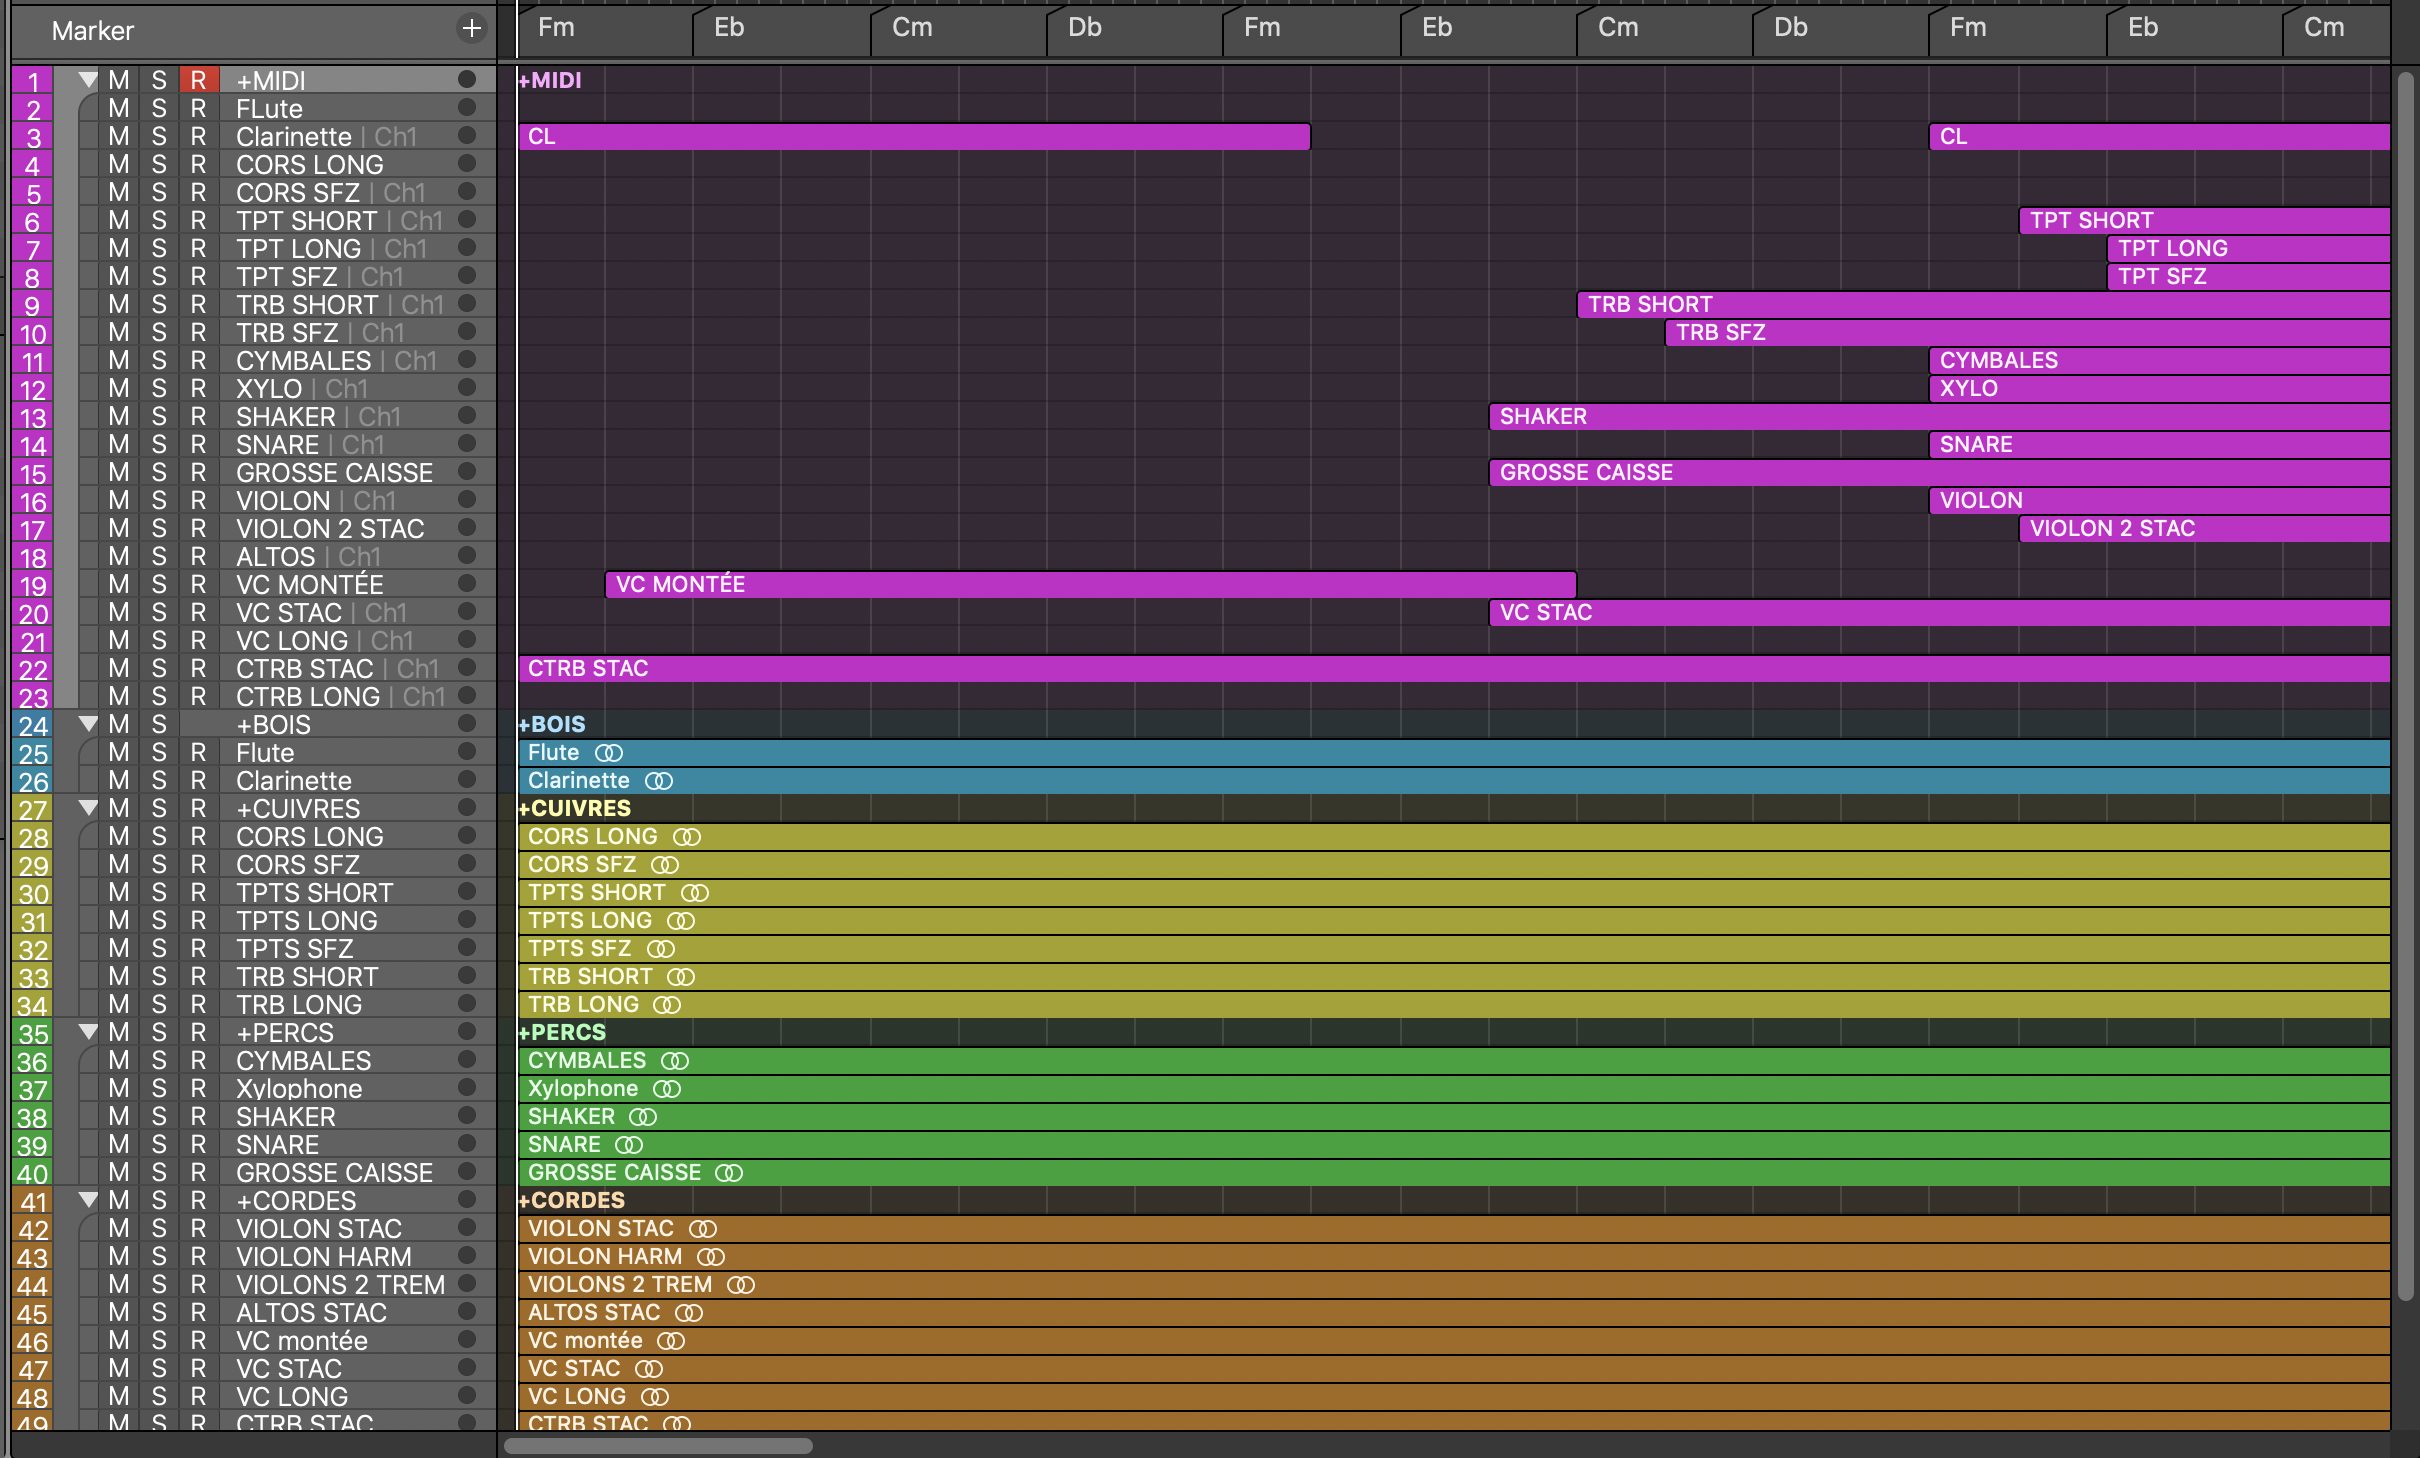
The project should look like this:
  • Mute the +MIDI folder track and listen to all the audio tracks to make sure everything sounds as expected. If necessary, make the required adjustments.
  • It is also important to add a track to the Logic project containing a “bounce master” audio file. In other words, an audio file containing all the tracks. It is important to create/export this file from the original Logic project (the one containing your virtual instruments). This master file will serve as a reference so that the professor can hear exactly how the student hears the output on their end.
  • Archive (.zip) the new Logic project folder and upload it to the platform chosen by the professor.